Basics QPPD - Customizing
To call the QPPD customizing, the transaction /n/SCT/QP_CUST must be called first. Alternatively, the transaction /SCT/QP_CUST can be stored in the favorites.
1. Creation of the specification type
To create a specification type, the Customizing transaction for specification types must be called up and the change mode switched to.
Click the "New Entries" button to create a new specification type.
A selection window appears for defining the specification type.
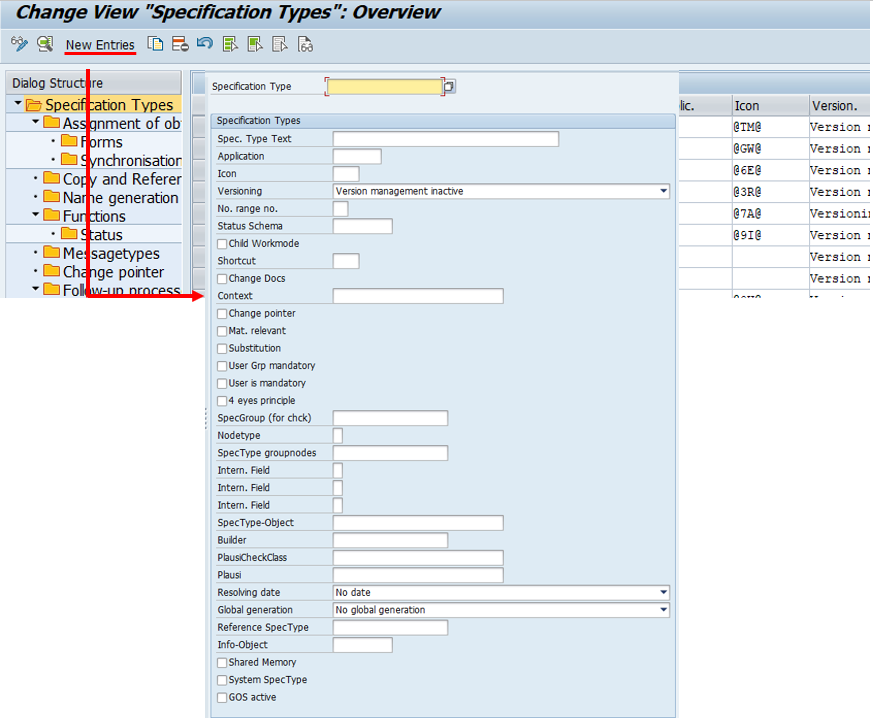
By filling in the fields, certain properties can be assigned to the specification type, which will influence the way it will be used later.
This how-to deals with the basic creation of a specification type, which is why not all fields and possible functions are described and shown.
The fields: Status scheme, Node type, and specification group must be created and maintained in Customizing before they are used.
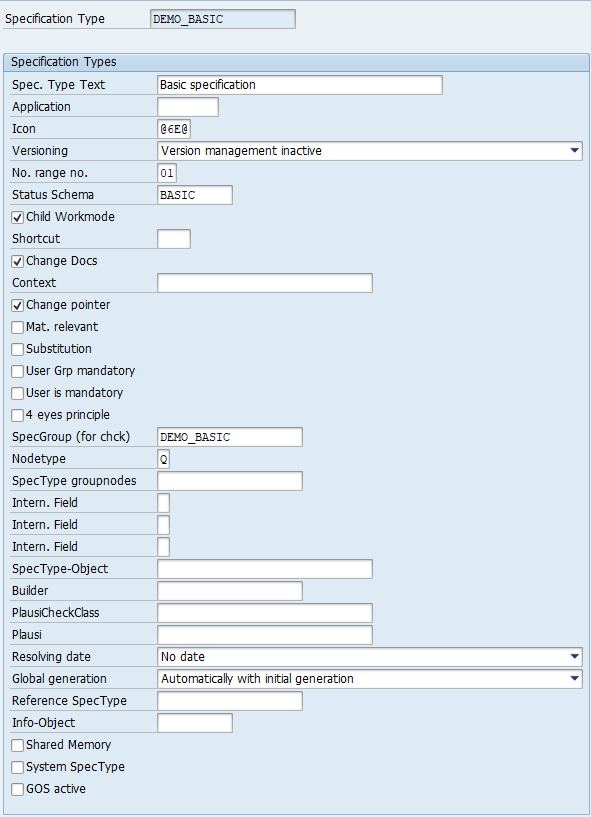
For a specification type to be used, four fields must always be filled in.
Specification type
Status scheme
Node type
Specification Group
The "Specification type" field can be used to enter any technical name for the specification type.
In this example, the specification type "DEMO_BASIC" is created and the status profile "Basic", the node type "Q" and the specification group "DEMO_BASIC" are assigned.
2. Assignment of object types
The fields: Object Types, Element Groups, Vertical Element Groups, Column Groups, Generation Classes, and Technical Objects must be created and maintained in Customizing before they are used.
The assignment is made via the menu path "Assignment object types" using the button "New entries".
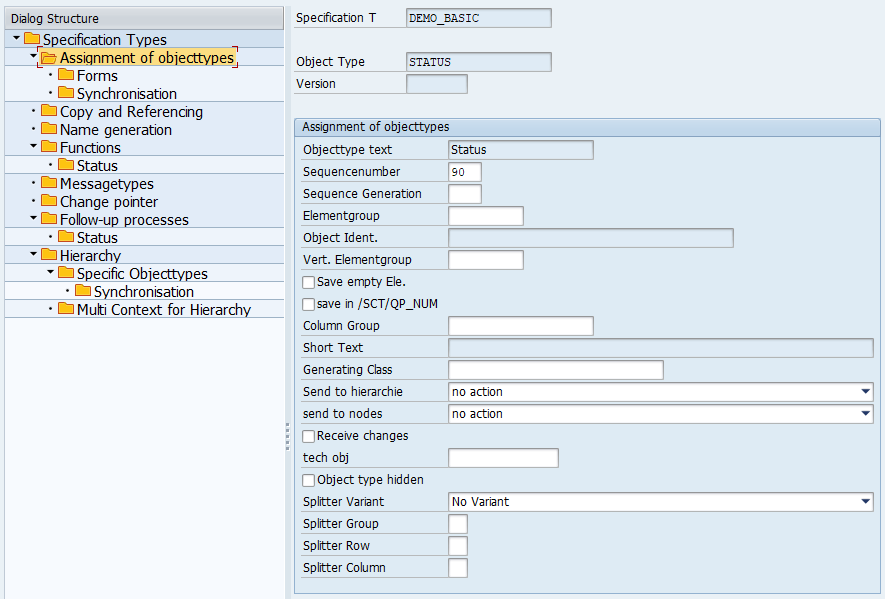
A new selection window appears for the assignment and further definition of the object type for the specification type.
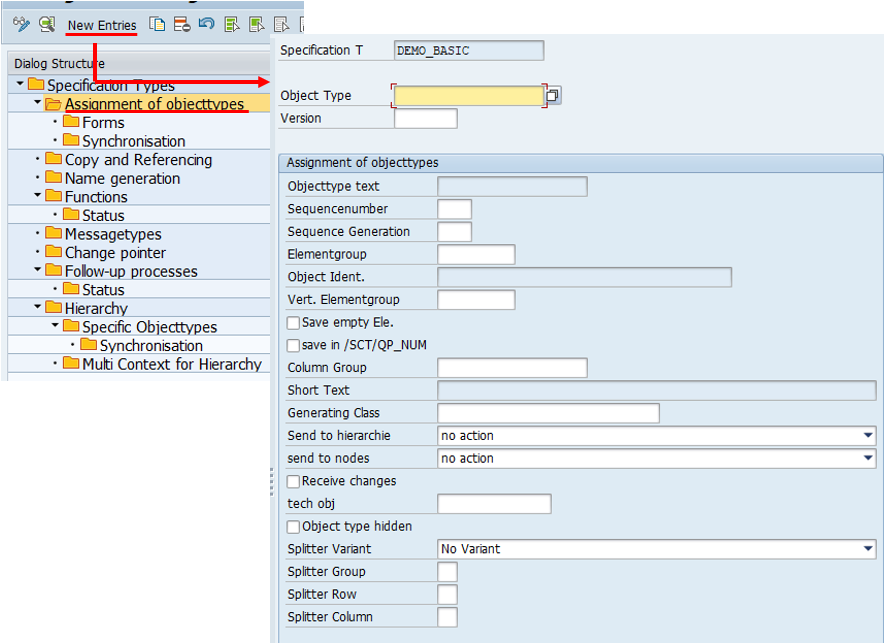
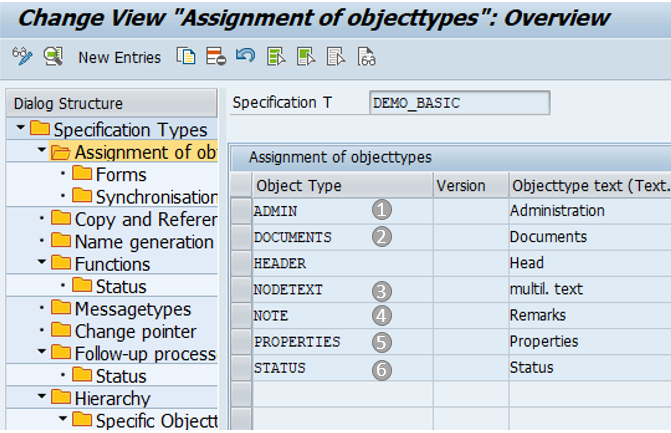
The specification type is assigned one object type with header information and one with status information (6), as well as one object type with administration information (1) as in Object Types for Administration of Nodes(H).
The object types already created are entered in the "Object type" field.
A generation class is assigned to the object type for the header information and the check mark for "Receive changes" is set.
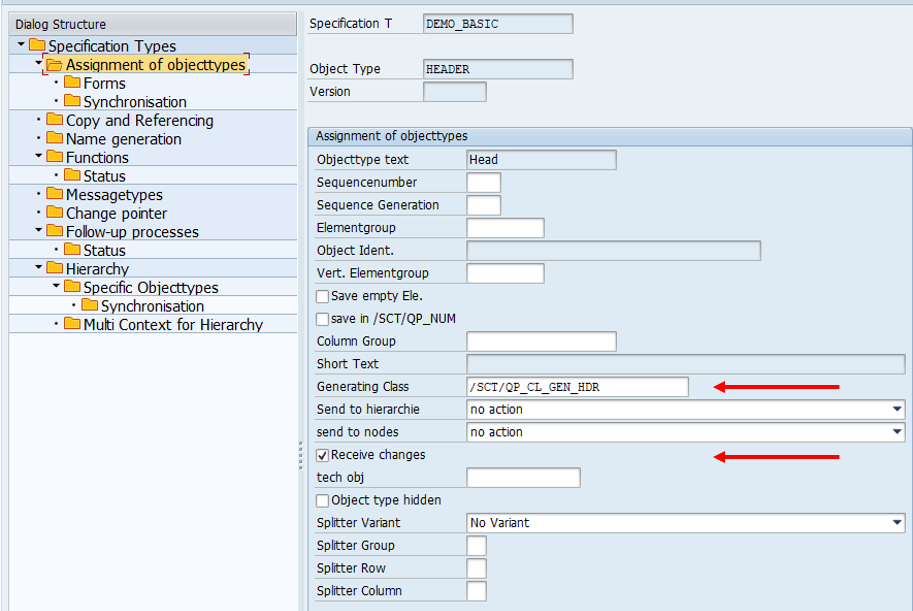
The object type for the status information does not receive any further entries.
In addition, examples of object types with text modules (3), with grid display (5), for document storage (2), and with remark texts (4) are assigned to the specification type.
An element group is entered for the object type with a grid display. So that elements from the element group can be displayed, a column group and a technical object are also entered. The check mark for "Receive changes" is also set.
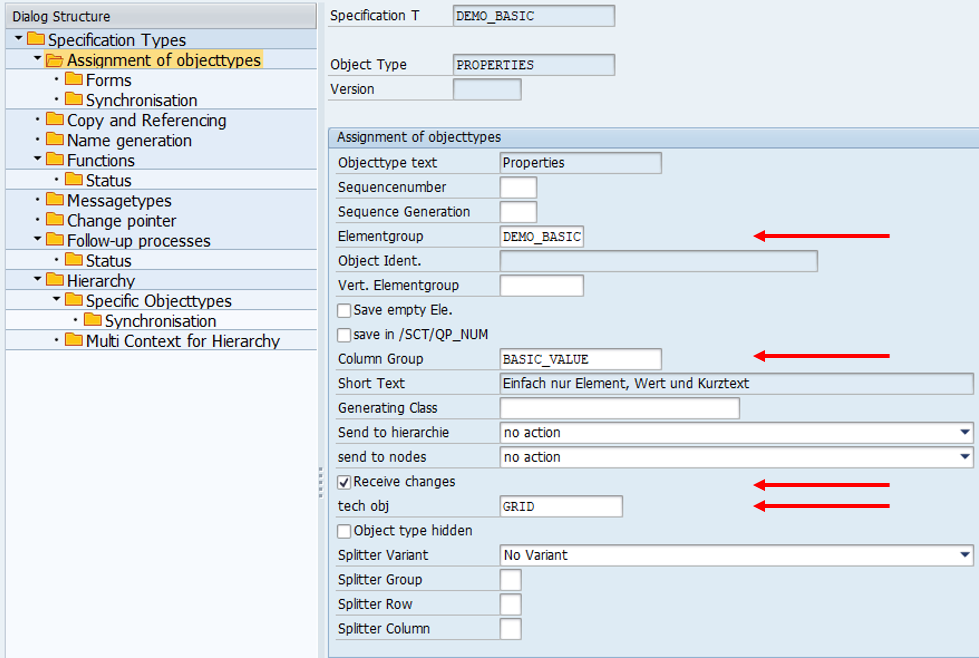
For all object types, except for the object type with remark text, the check mark for "Receiving changes" is set. A technical object (DOCUMENT) is also assigned to the object type for document storage.
No other additional settings are made for the object types.
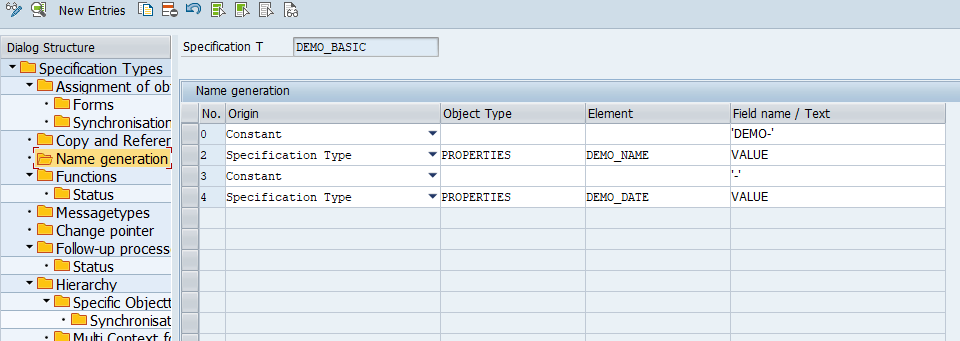
3. Name generation for specification type
Via the menu path "Name generation" and the button "New entries" the selection window for setting up a name generation for the specification type appears.
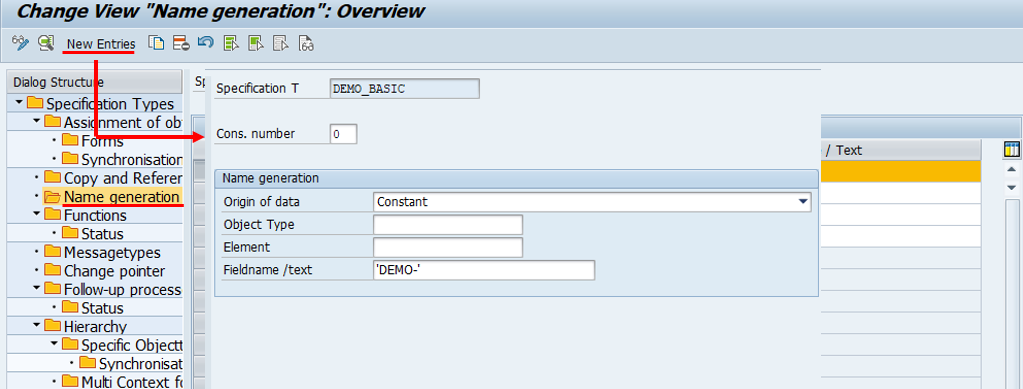
In this example, the name for the specification type is composed of a constant (DEMO-) and the contents of the value fields (Value) of the elements "DEMO_NAME' and "DEMO_DATE".
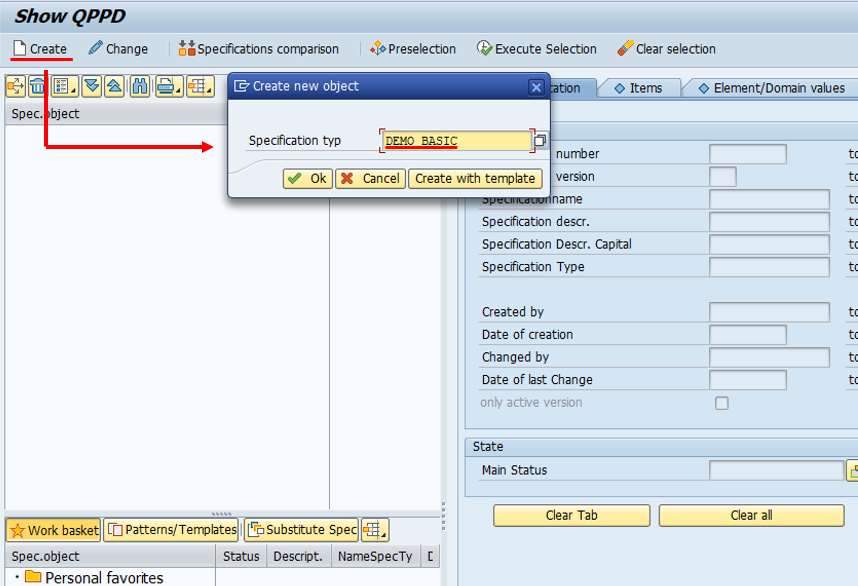
4. Creation of the specification in the QPPD
No further Customizing settings are required and to create the specification type, you must switch to the QPPD Cockpit.
To start the QPPD Cockpit, the transaction /n/SCT/QPPD or /n/SCT/QP_QV must first be called. Alternatively, the transaction /SCT/QPPD can be stored in the favorites.
The "Create" button opens the selection window for creating a specification type. The technical name from Customizing is entered here and confirmed by clicking the "OK" button or pressing Enter. In this example "DEMO_BASIC".
The specification type appears on the left side of the navigation window and all assigned object types are displayed as tabs in the dynamic display area.
PROPERTIES
NODETEXT
NOTE
DOCUMENTS
STATUS
ADMIN
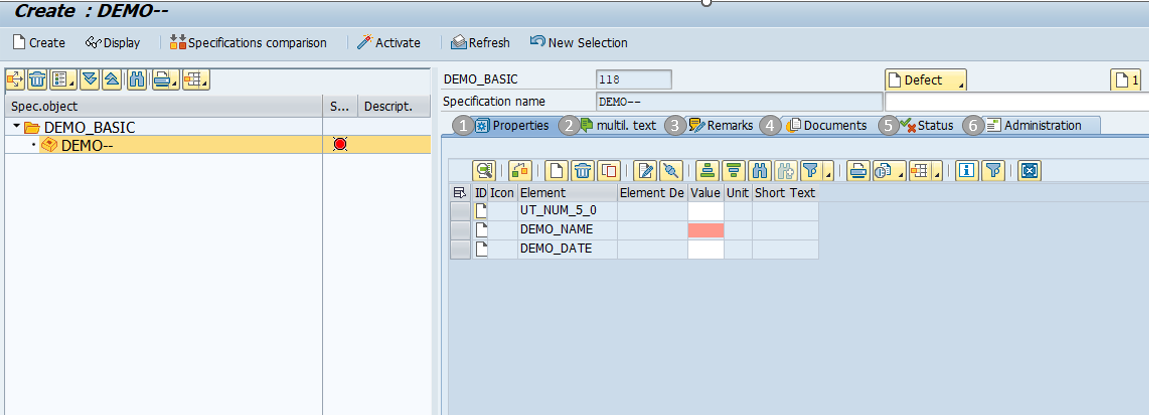
The "PROPERTIES" tab shows all elements that have been assigned to the column group of the object type.
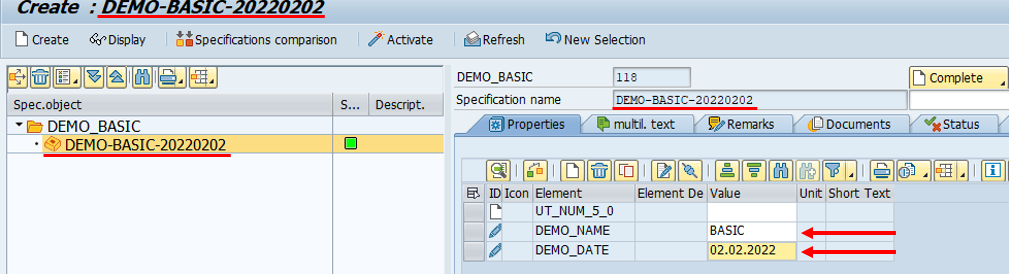
As an example, the value "BASIC" is entered in the "Value" field of the "DEMO_NAME" element and any date is entered in the "Value" field of the "DEMO_DATE" element.
After the entries have been confirmed with Enter, the name of the specification type changes based on the name generation that has been set.
If required, item types can be assigned to a specification type. A How-To for creating Item Types under a specification type can be found here Creating Item Types under Specification Type (H).