QPPD-Customizing
Next, we set up QPPD customizing so that one or more QPPD objects are automatically created when a material is created.
It is not possible to synchronize the values from the material master into the associated QPPD objects.
The following steps are necessary:
Define spezification types
With the MM App it is possible to integrate the QPPD on the following three levels of the material master.
Level | Explanation | SAP Standard Table |
|---|---|---|
Cross-plant | Contains central material master data (e.g. material number, description), valid for all plants → depicts the general identity of the material. | MARA |
Factory-dependent | Plant-specific material data (e.g. disposition, storage) → describes how the material is used as a product in the respective plant. | MARC |
Factory production version | Links material with bill of materials and routing → defines the production variant of a product. | MKAL |
Corresponding spezification types must be created for all levels that are to be synchronized with a QPPD object.
Several spezification types can also be created for each level.
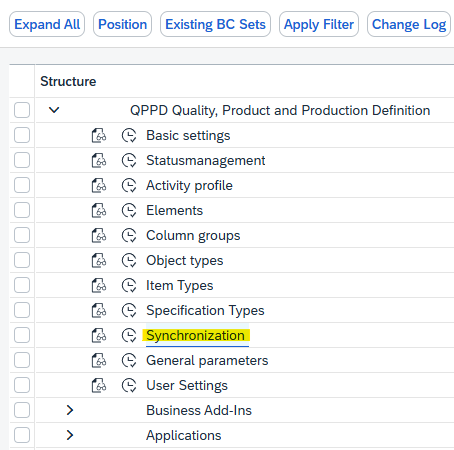
Setting up synchronization
Execute transaction /SCT/QP_CUST and select synchronization.
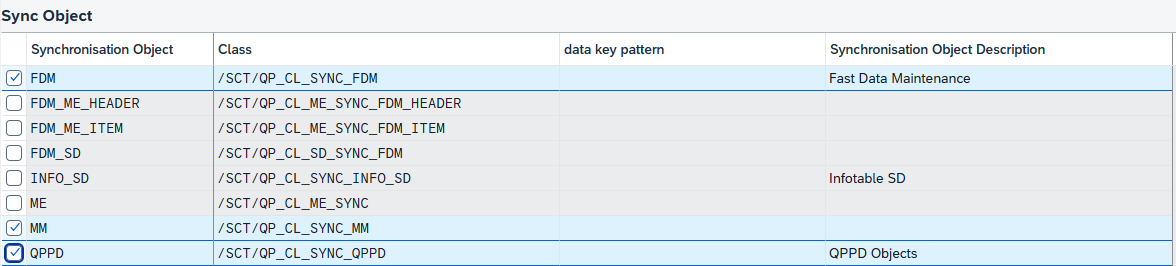
Syncobject
The following objects must be created:
Sync object MM with class /SCT/QP_CL_SYNC_MM.
Sync object QPPD with class /SCT/QP_CL_SYNC_QPPD.
Sync object FDM with class /SCT/QP_CL_SYNC_FDM.
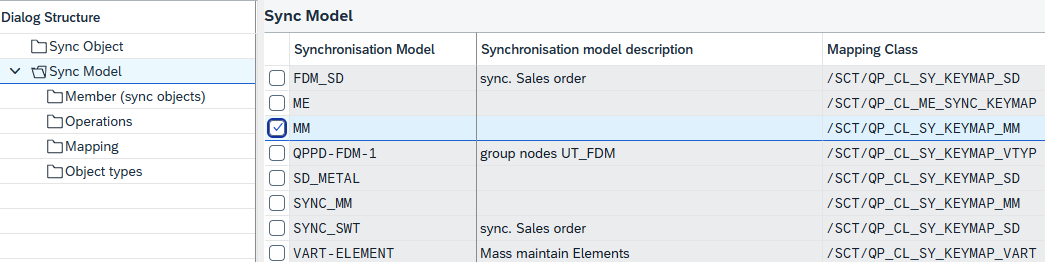
Syncmodel
Create the MM sync model with mapping class /SCT/QP_CL_SY_KEYMAP_MM.
Member
The following entries must be created:
Syncobject = MM
Seq. No. = 0
Member type = MTART
Range limit included (Including)
equal
Low = ZQP
Syncobject = FDM
Seq. No. = 0
Member type = VART
Range limit included (Including)
equal
Low = MM_FDM
Syncobject = QPPD
Seq. No. = 1
Member type = OVART
Range limit included (Including)
equal
Low = Material

Operation
Create new operation with the following values:

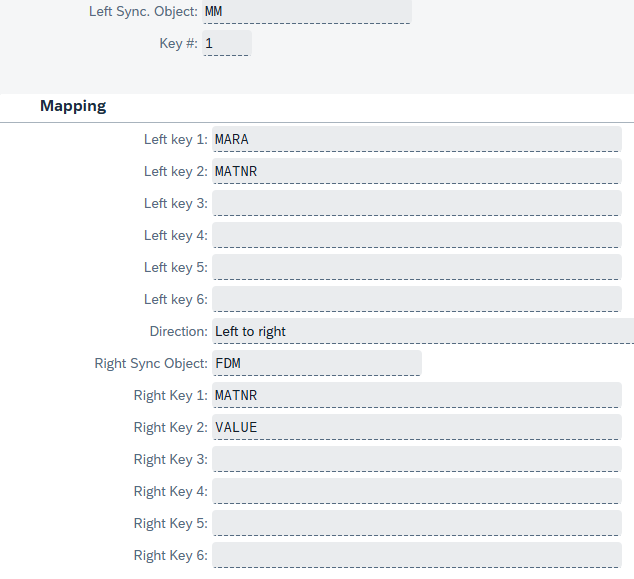
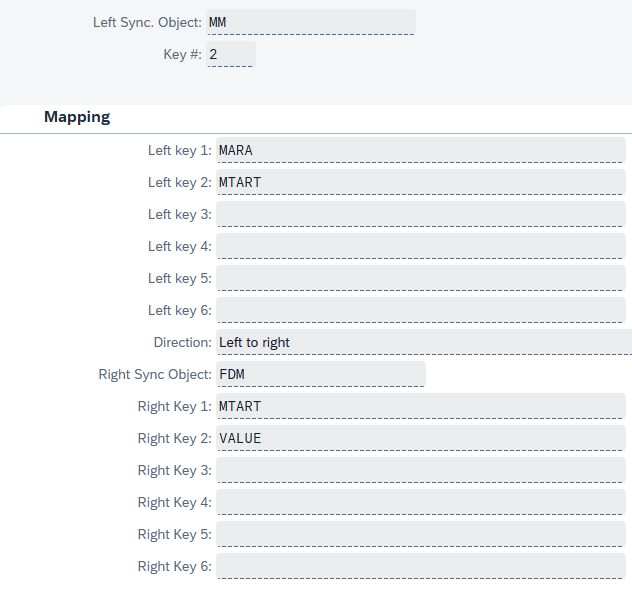
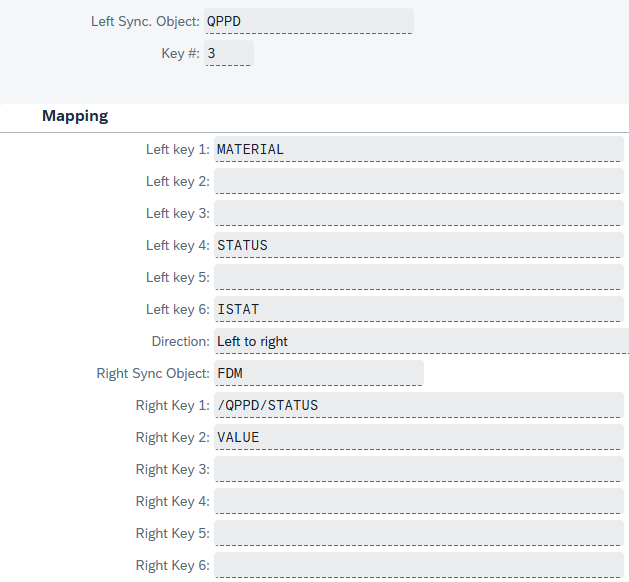
Mapping
Create a new mapping with the following values:
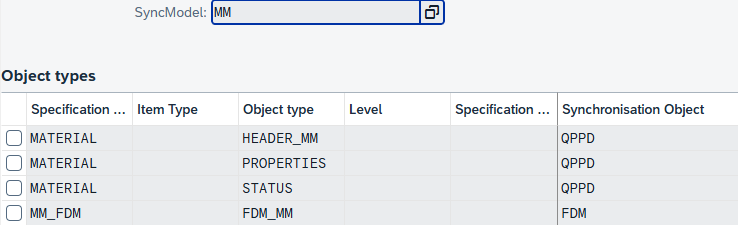
Object types
Add the following entries:
Configure synchronization
Call up transaction /SCT/QP_CUST again and navigate to material master functions:
Applications → Material master → Material master functions

Define material type
A new entry is created with the following parameters:
Material type = HAWA (or the material type used)
Carrier Spec Type FDM = MM_FDM
Sync model = MM
Sync object = MM

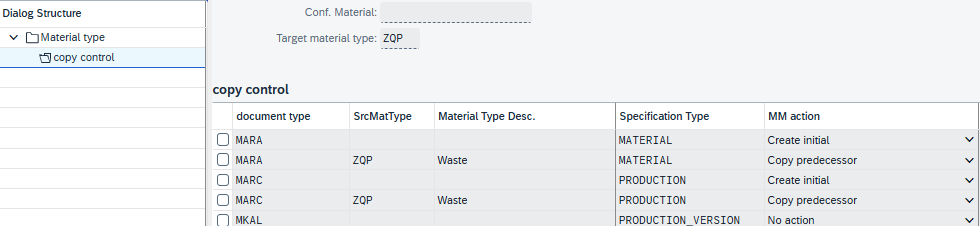
Set up copy control
Select the newly created material type and open the Copy control tab.
Create the following entries: